
The goal of the FormRouter Form Builder is simple: design your form once and publish it as both an HTML web form and a fillable PDF — all in one place. When requirements change, update the form and re-publish in minutes instead of maintaining two versions.
1. Before you start
The Form Builder runs in your web browser — there is nothing to install.
Click Here To Open The Form Builder
You will need:
- The Form Builder file (provided by FormRouter) opened in a modern browser — Chrome, Edge, Firefox, or Safari.
- About 15 minutes.
Your work saves automatically in the browser as you go, so you can close the tab and pick up where you left off. Just remember to use the same browser on the same computer.
2. A tour of the workspace
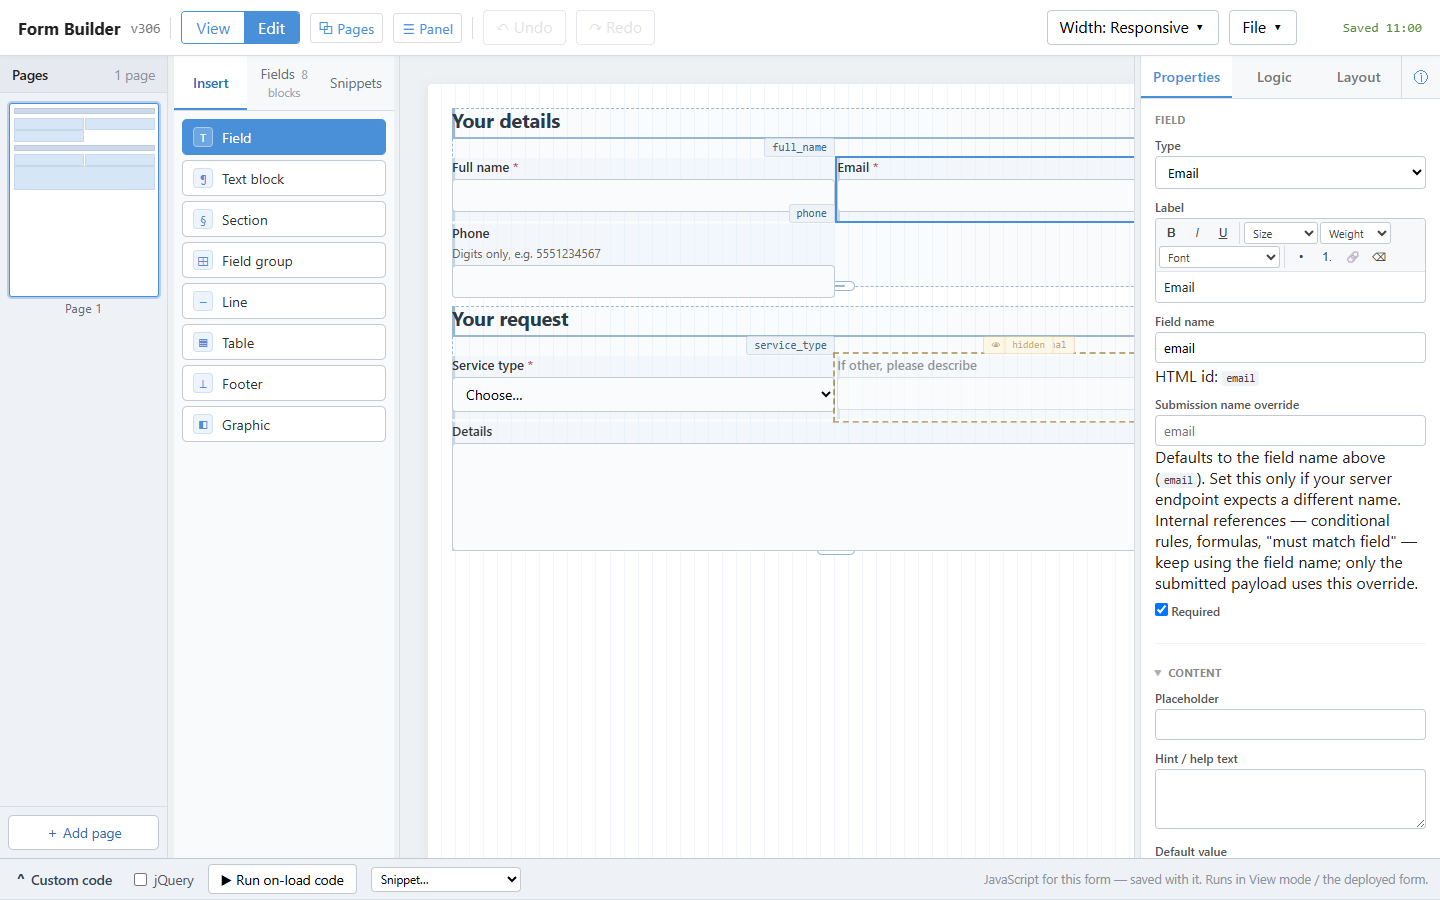
The Form Builder workspace in Edit mode.
The workspace has five areas:
- Toolbar (top) — switch between View and Edit modes, open the Pages strip and the properties Panel, undo/redo, and the File menu.
- Pages strip (far left) — a thumbnail for each page of your form.
- Panel (left) — three tabs: Insert (add new blocks), Fields (an index of everything on the form), and Snippets (your saved, reusable blocks).
- Canvas (center) — your form. Blocks snap to a layout grid, so everything lines up.
- Properties panel (right) — settings for whatever is selected, with Logic and Layout tabs.
3. Create a form
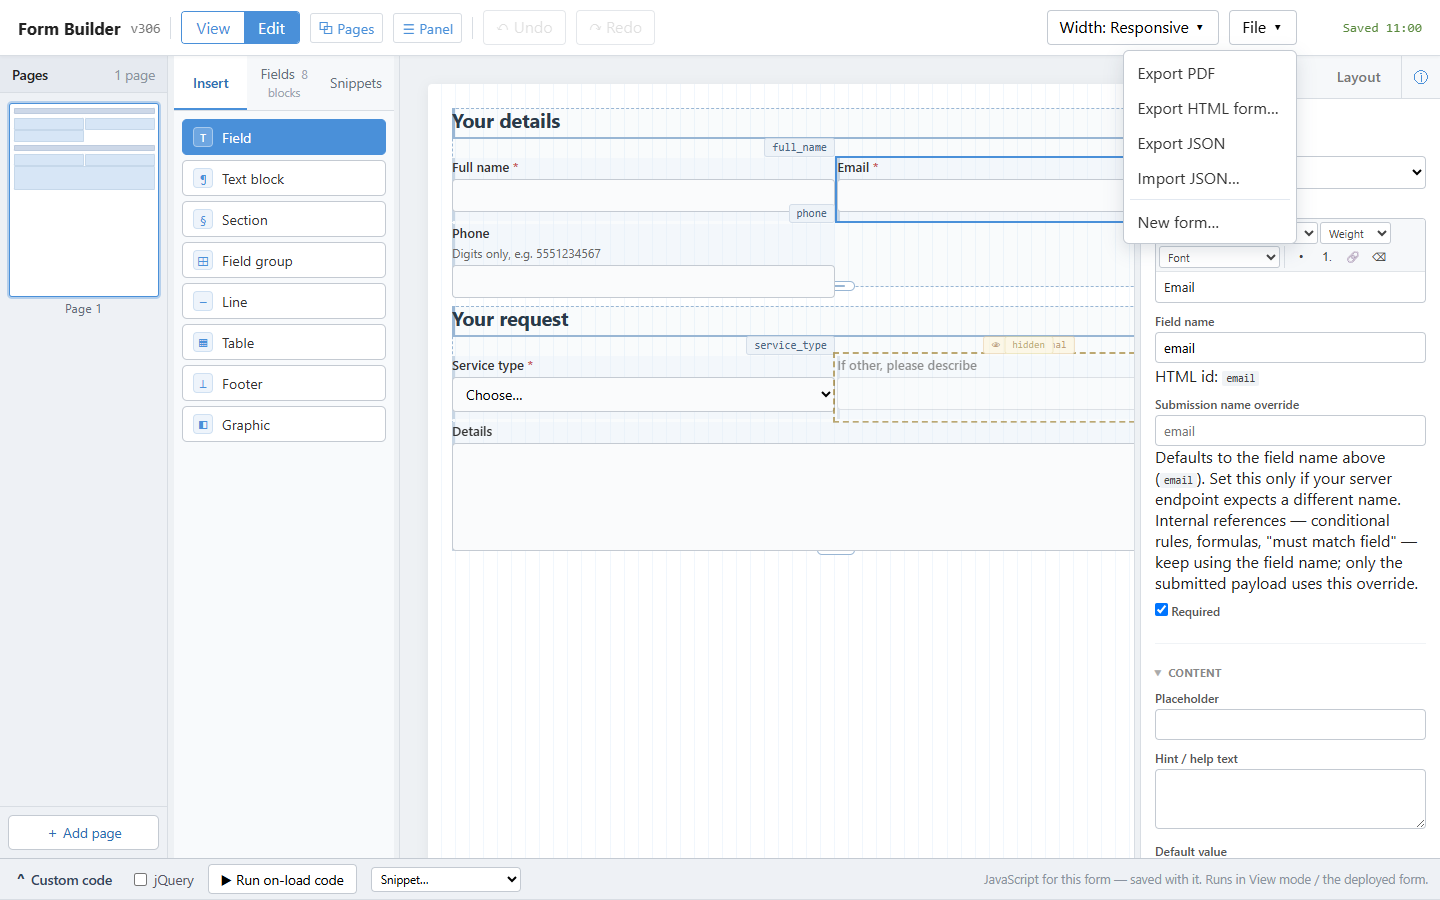
The File menu.
- Click File ▸ New form… to start fresh.
- You can also Import JSON… to load a form someone shared with you, or Export JSON… to back one up or pass it on.
Tip: Everything you build autosaves in this browser. Export JSON when you want a file you can keep or share.
4. Add fields — click or drag
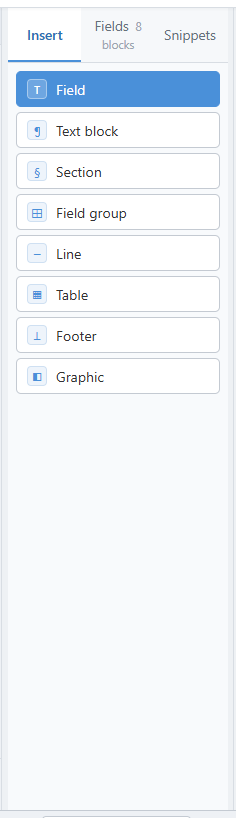
The Insert tab: fields, text blocks, sections, tables and more.
There are two ways to add a block to the canvas:
- Click an Insert button — the block is placed in the first free spot on the current page.
- Drag an Insert button onto the canvas — a dashed outline shows exactly where the block will land; release to place it there.
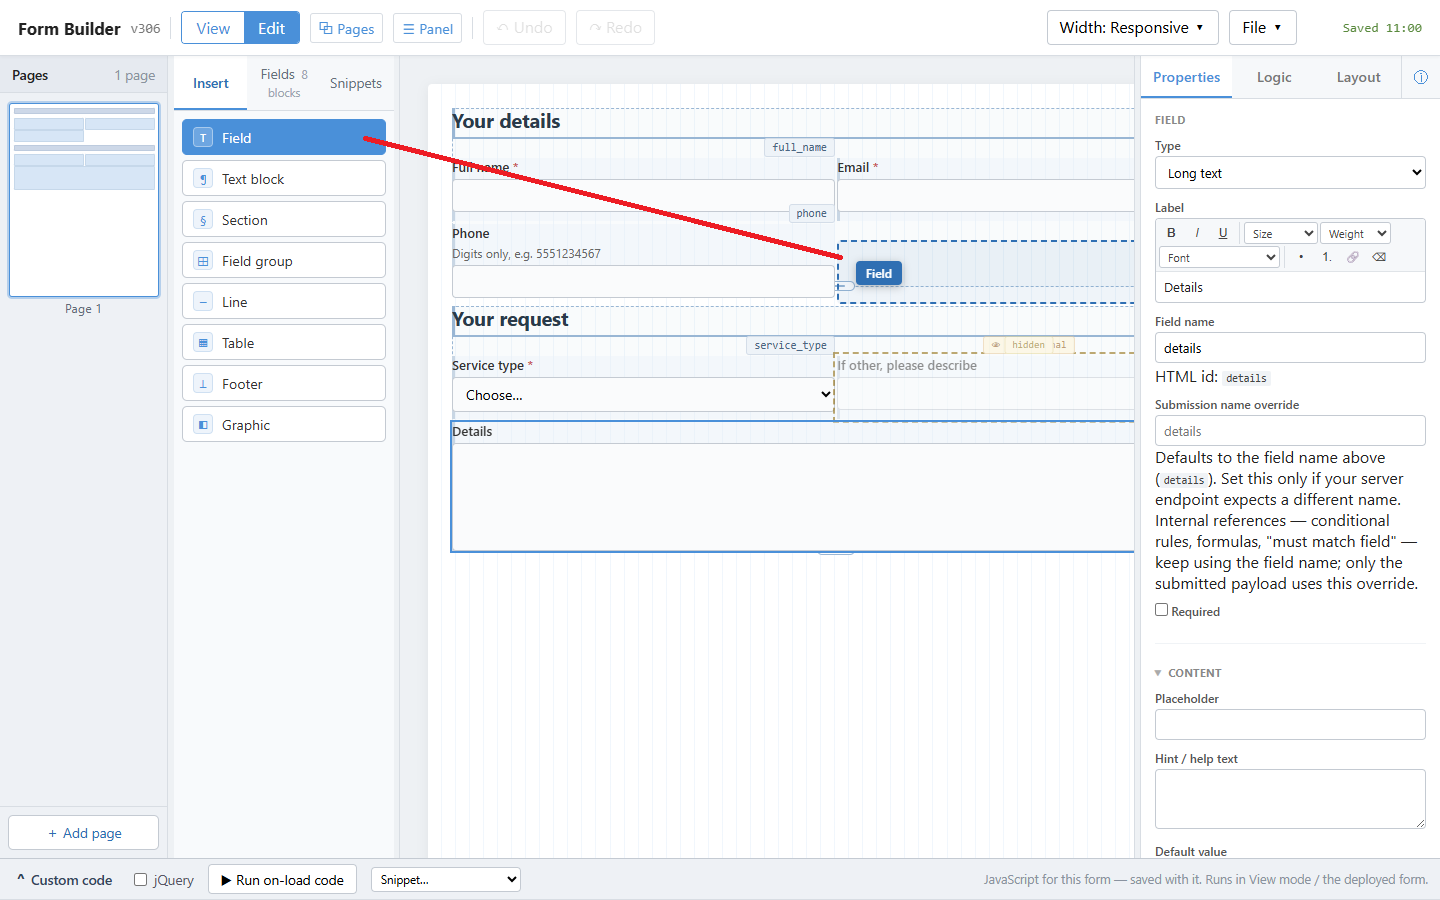
Dragging a Field onto the canvas — the dashed outline shows where it will land.
5. Edit a field
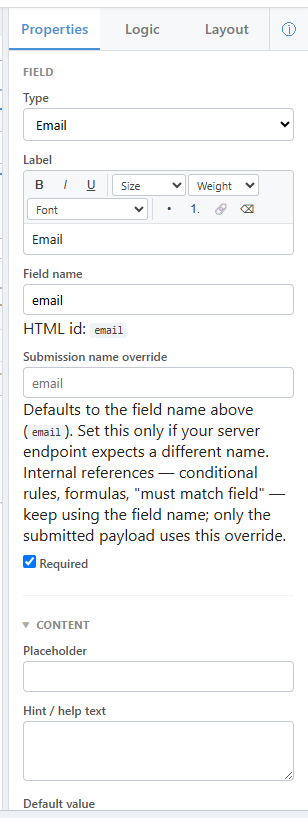
The Properties panel for an Email field.
Select any field on the canvas and use the Properties panel on the right:
- Type — change a plain text box into Email, Phone, Date, Dropdown, File upload, Signature and more.
- Label — the question your users see. Field name — the identifier used when the form is submitted.
- Required — tick it and the form will not submit until the field is filled. A red * appears next to the label.
- Placeholder and Hint — help your users answer correctly.
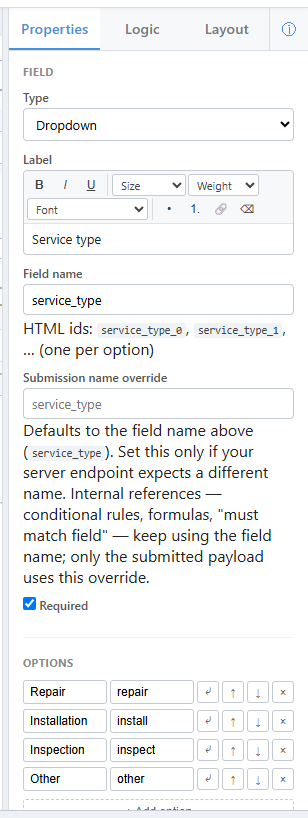
Choice fields (dropdowns, radio buttons, checkboxes) have an Options list — add, remove and reorder the choices.
Notice the short explanations under many settings (for example, under Submission name override). They are great while you learn, but once you know the tool they take up space. The ⓘ button at the right end of the Properties / Logic / Layout tabs turns them off and on:
- Click ⓘ once to hide the property descriptions — the panel becomes much more compact.
- Click ⓘ again to bring them back. The builder remembers your choice.
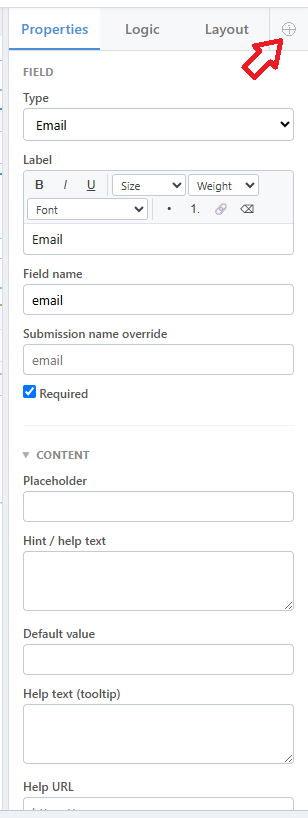
The same Properties panel with descriptions hidden — the ⓘ button toggles them.
6. Show and hide with Logic
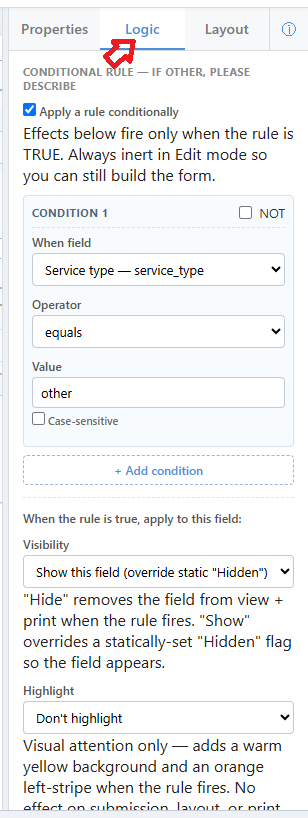
A Logic rule: show this field only when Service type is “Other”.
Logic rules let the form react to answers. In our example, the “If other, please describe” box stays hidden until the user picks Other:
- Select the field you want to control and open the Logic tab.
- Add a condition — pick the field to watch, an operator (equals, is filled, greater than…) and a value.
- Choose the action: show or hide, require, disable, highlight and more.
Tip: Rules on a section apply to everything inside it — one rule can show or hide a whole group of fields.
7. Form settings — the Layout tab
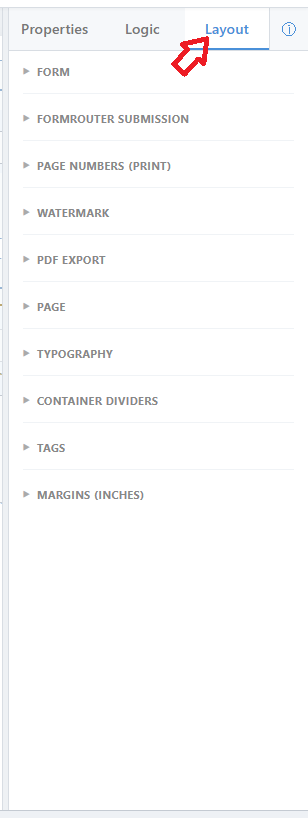
The Layout tab: page size, margins, and form-wide options.
The Layout tab holds settings for the whole form:
- Form title and description, and the text on the Submit button.
- Page size (Letter, A4…), orientation, margins and density.
- Options for the published form, such as Save progress in the browser (lets users resume later) and the “Save a copy (PDF)” button (lets users keep a copy of what they submitted).
8. Working with pages
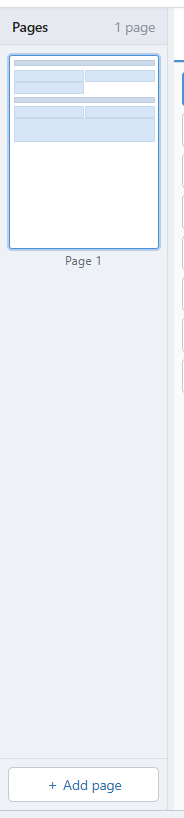
The Pages strip — one thumbnail per page.
Long forms flow across pages. The Pages strip on the far left shows a live thumbnail of each page — click one to jump there, or use + Add page for more room. Page breaks appear on the canvas as you build.
9. Reuse your work — Snippets
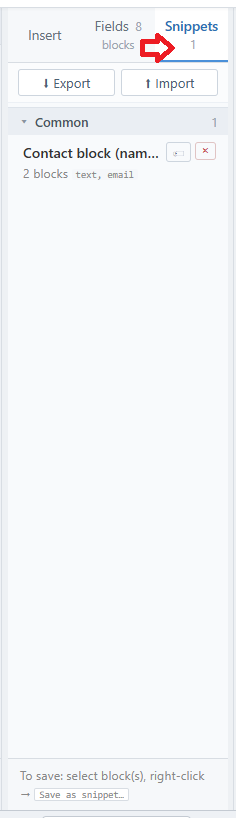
The Snippets tab: saved block groups you can reuse on any form.
- Select one or more blocks on the canvas, right-click, and choose Save as snippet…
- Insert a snippet by clicking it (auto-placed) or dragging it onto the canvas — the outline shows the whole group’s footprint.
- Use Export / Import in the Snippets tab to share your snippet library between computers or teammates.
10. Preview your form
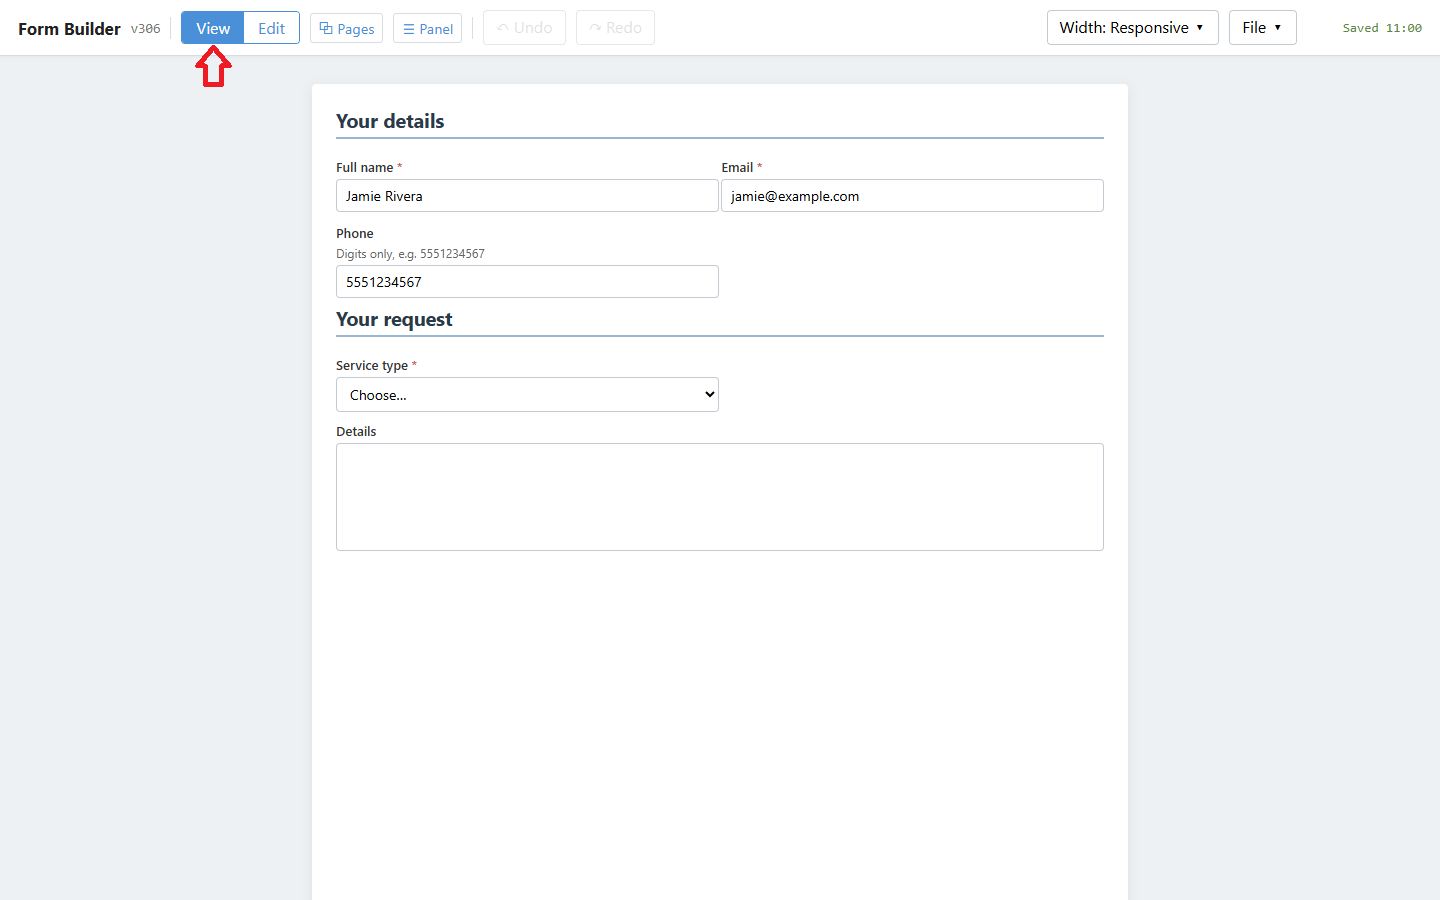
View mode — the form as your users will see it.
Click View in the toolbar to try the form yourself: fill fields, watch Logic rules fire, and check required-field messages. The Width menu previews how the form behaves on narrower screens. Click Edit to go back to building.
11. Publish — export your form
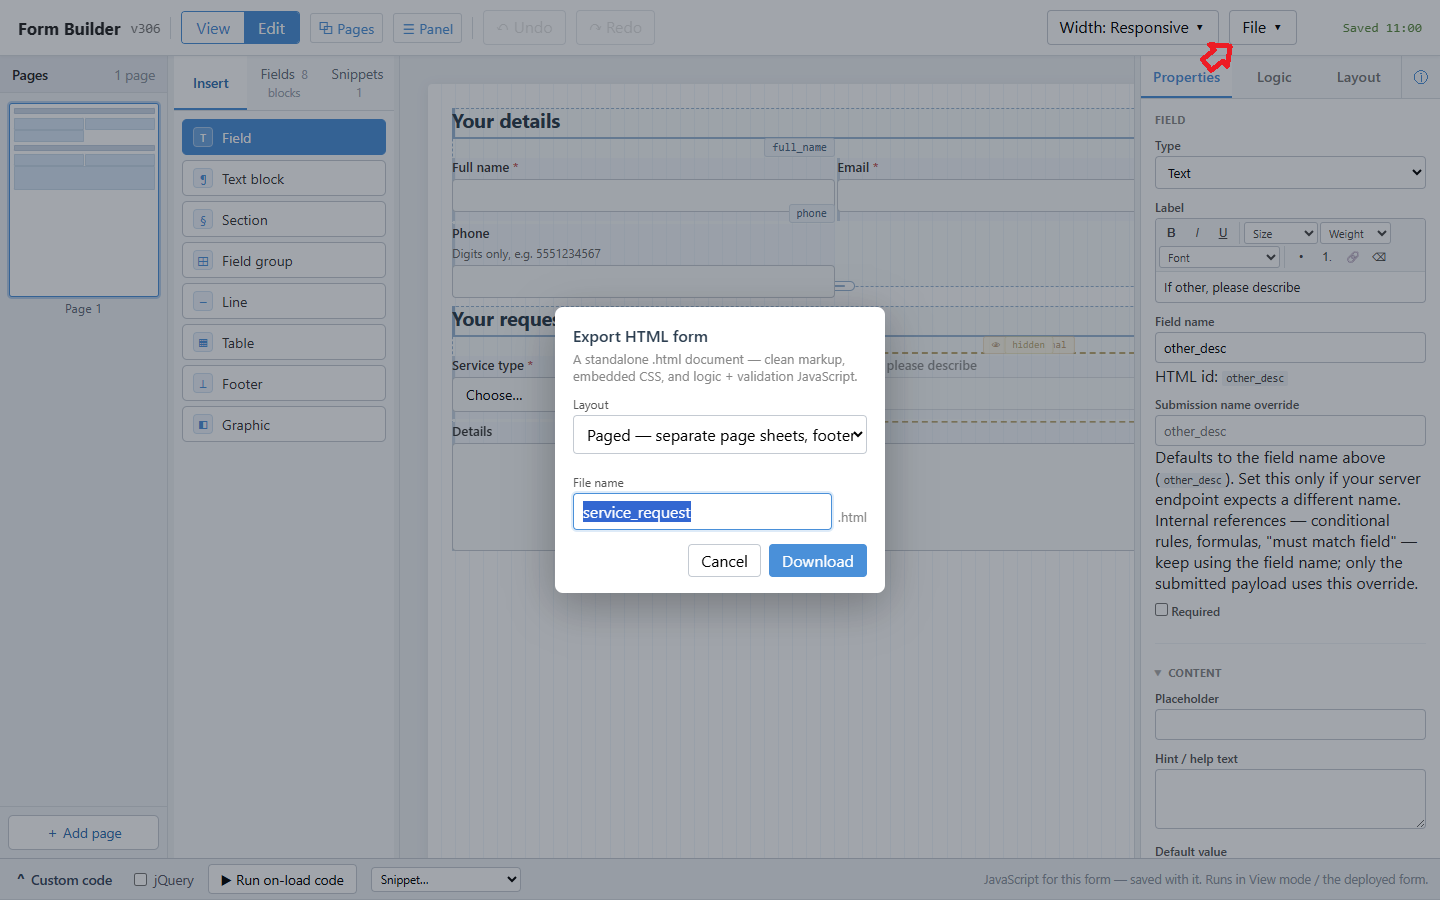
Exporting as an HTML form: pick a file name and a layout.
When the form is ready, open File ▸ Export and choose:
- HTML form — a single web page you can host anywhere or send by email. Choose Paged (separate sheets, like paper) or Stacked (one continuous column). Submissions go to your FormRouter account.
- Fillable PDF — an Acrobat form with real fields, ready to distribute.
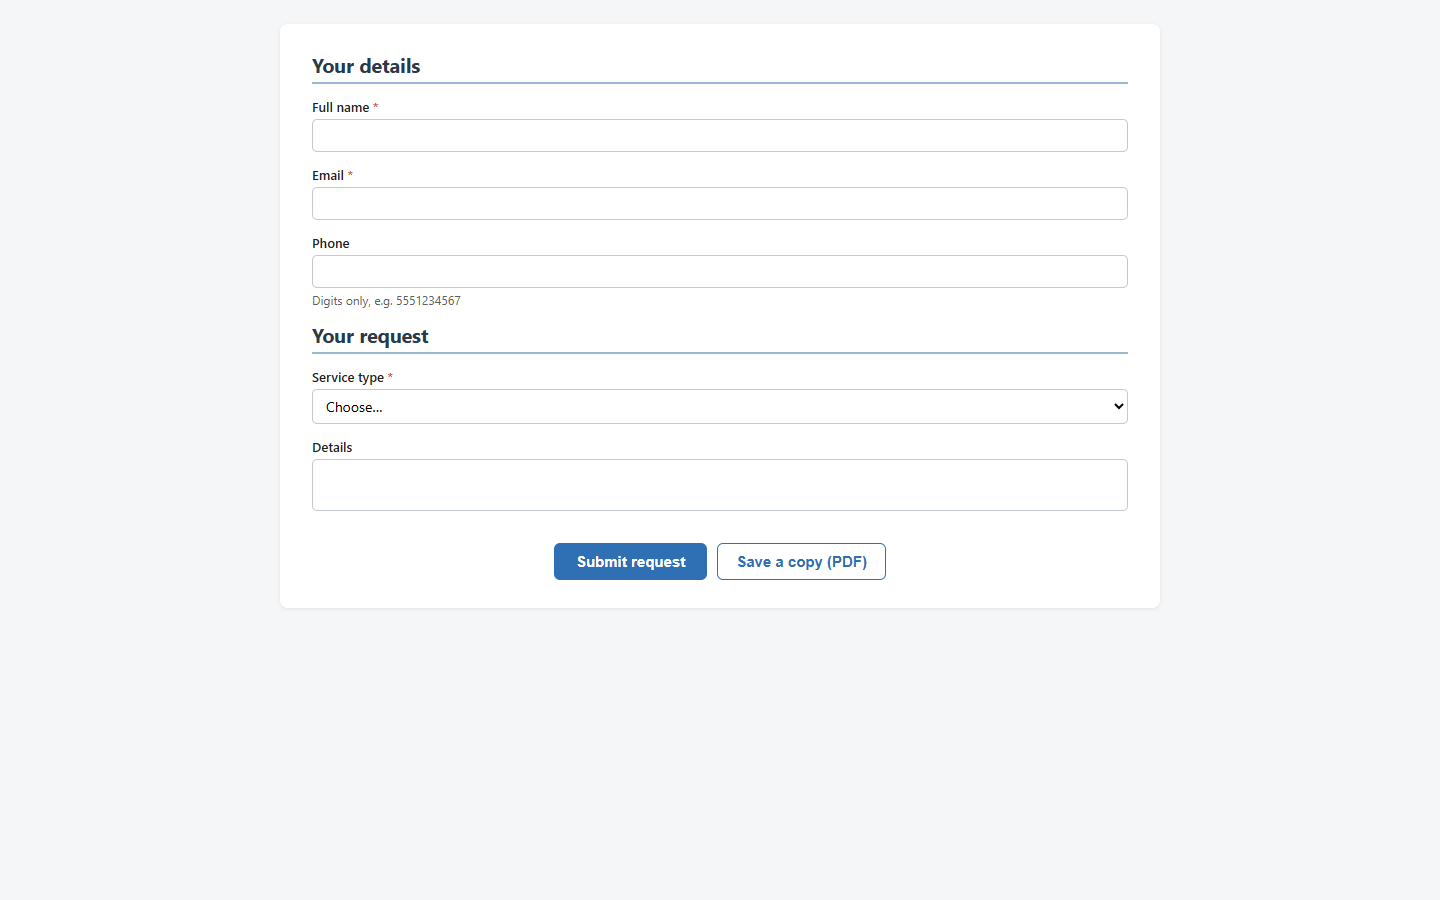
The exported HTML form, ready for your users — with Submit and the optional “Save a copy (PDF)” button.
12. Five habits that pay off
- Name fields clearly (first_name, order_total) — these names arrive in your FormRouter submissions.
- Mark required fields as you add them, not at the end.
- Preview in View mode often — especially after adding Logic.
- Export JSON as a backup before big changes. Undo (Ctrl+Z) covers the small ones.
- Save anything you will build twice as a Snippet.
If you like this tool…
… and you need to host and capture your online forms (or PDFs) securely, please reach out to us — this is what we have been doing for over 25 years.
Recent Comments